Learn how to create a simple Serverless FastAPI with AWS Lambda and API Gateway. The Serverless FastAPI will be ran on an AWS Lambda by using Mangum and AWS API Gateway will handle routing all requests to the Lambda.
Learn how to create a simple Serverless FastAPI with AWS Lambda and API Gateway.
The Serverless FastAPI will be ran on an AWS Lambda by using Mangum and AWS API Gateway will handle routing all requests to the Lambda.
You can find the repository for the finished app here.
I originally came across Mangum through this awesome blog post here that shows an example of Continuously Deploying a FastAPI to AWS Lambda with SAM CLI and Travis.
About AWS Lambda and API Gateway
Traditionally a Rest API would be hosted on an EC2 instance or something similar. This requires a standing server to be provisioned constantly even when it is not being used potentially incurring more cost.
Another option is to setup API Gateway to use a wildcard for any endpoint and redirect to the FastAPI Lambda and internally route the request accordingly. This way the only cost incurred is whenever there is a request made to the API.
Caveats
Lambdas can be a slightly slower to respond since they have to be spun up whenever there is a request.
However, AWS does a pretty good job of reusing Lambdas for following requests after the initial one in order to reduce latency.
Depending on your situation a standing server might have less latency. So if optimizing speed is your highest priority then that's something you might want to take into account.
Requirements
- Python
- Virtualenv
- AWS Account
Create FastAPI App
Virtualenv
First you need to create and activate your virtual environment.
There are several different tools you can use for this so feel free to use your desired method. In this tutorial I'm going to use Virtualenv.
If you're not familiar with how to do this you can follow this quick tutorial on How To Install Virtualenv on Mac OS.
Setup Virtual Environment
Once you have Virtualenv installed create a new folder.
mkdir serverless-fastapi
Then cd into it.
cd serverless-fastapi
Running the following command will create a new folder in the root of your project where all of the dependencies of the app will be stored.
virtualenv -p python3.7 env
Then set your terminal to reference the virtual environment.
source ./env/bin/activate
Install FastAPI
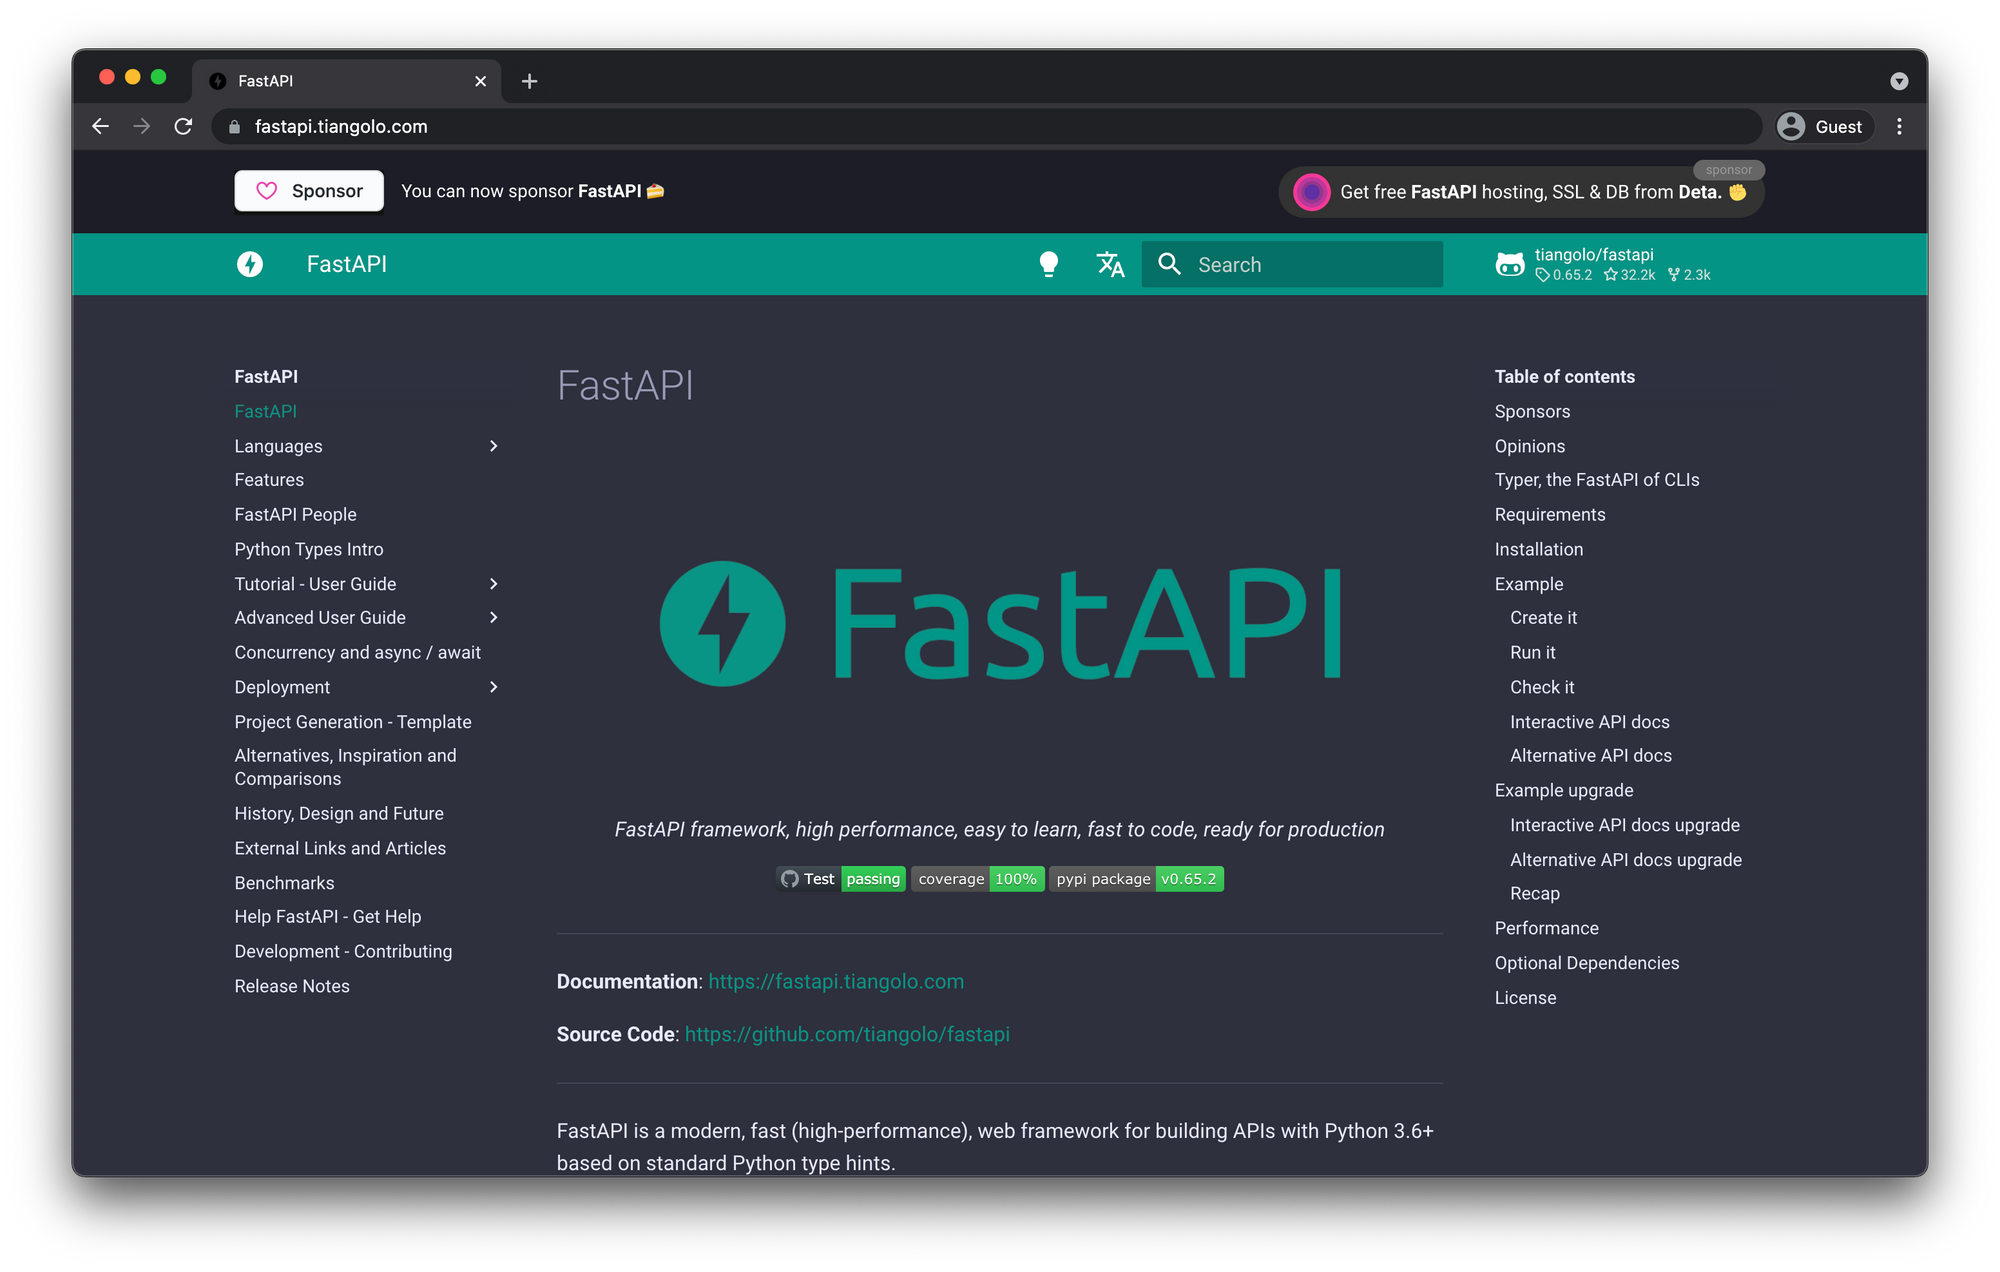
Now that the virtual environment is setup we can install some dependencies which will be FastAPI and Uvicorn
pip install fastapi[all] uvicorn
Add main.py File
from fastapi import FastAPI

app = FastAPI()


@app.get("/")
async def root():
  return {"message": "Hello World"}
Run FastAPI
uvicorn main:app --reload
In your browser visit htpp://localhost:8000/docs
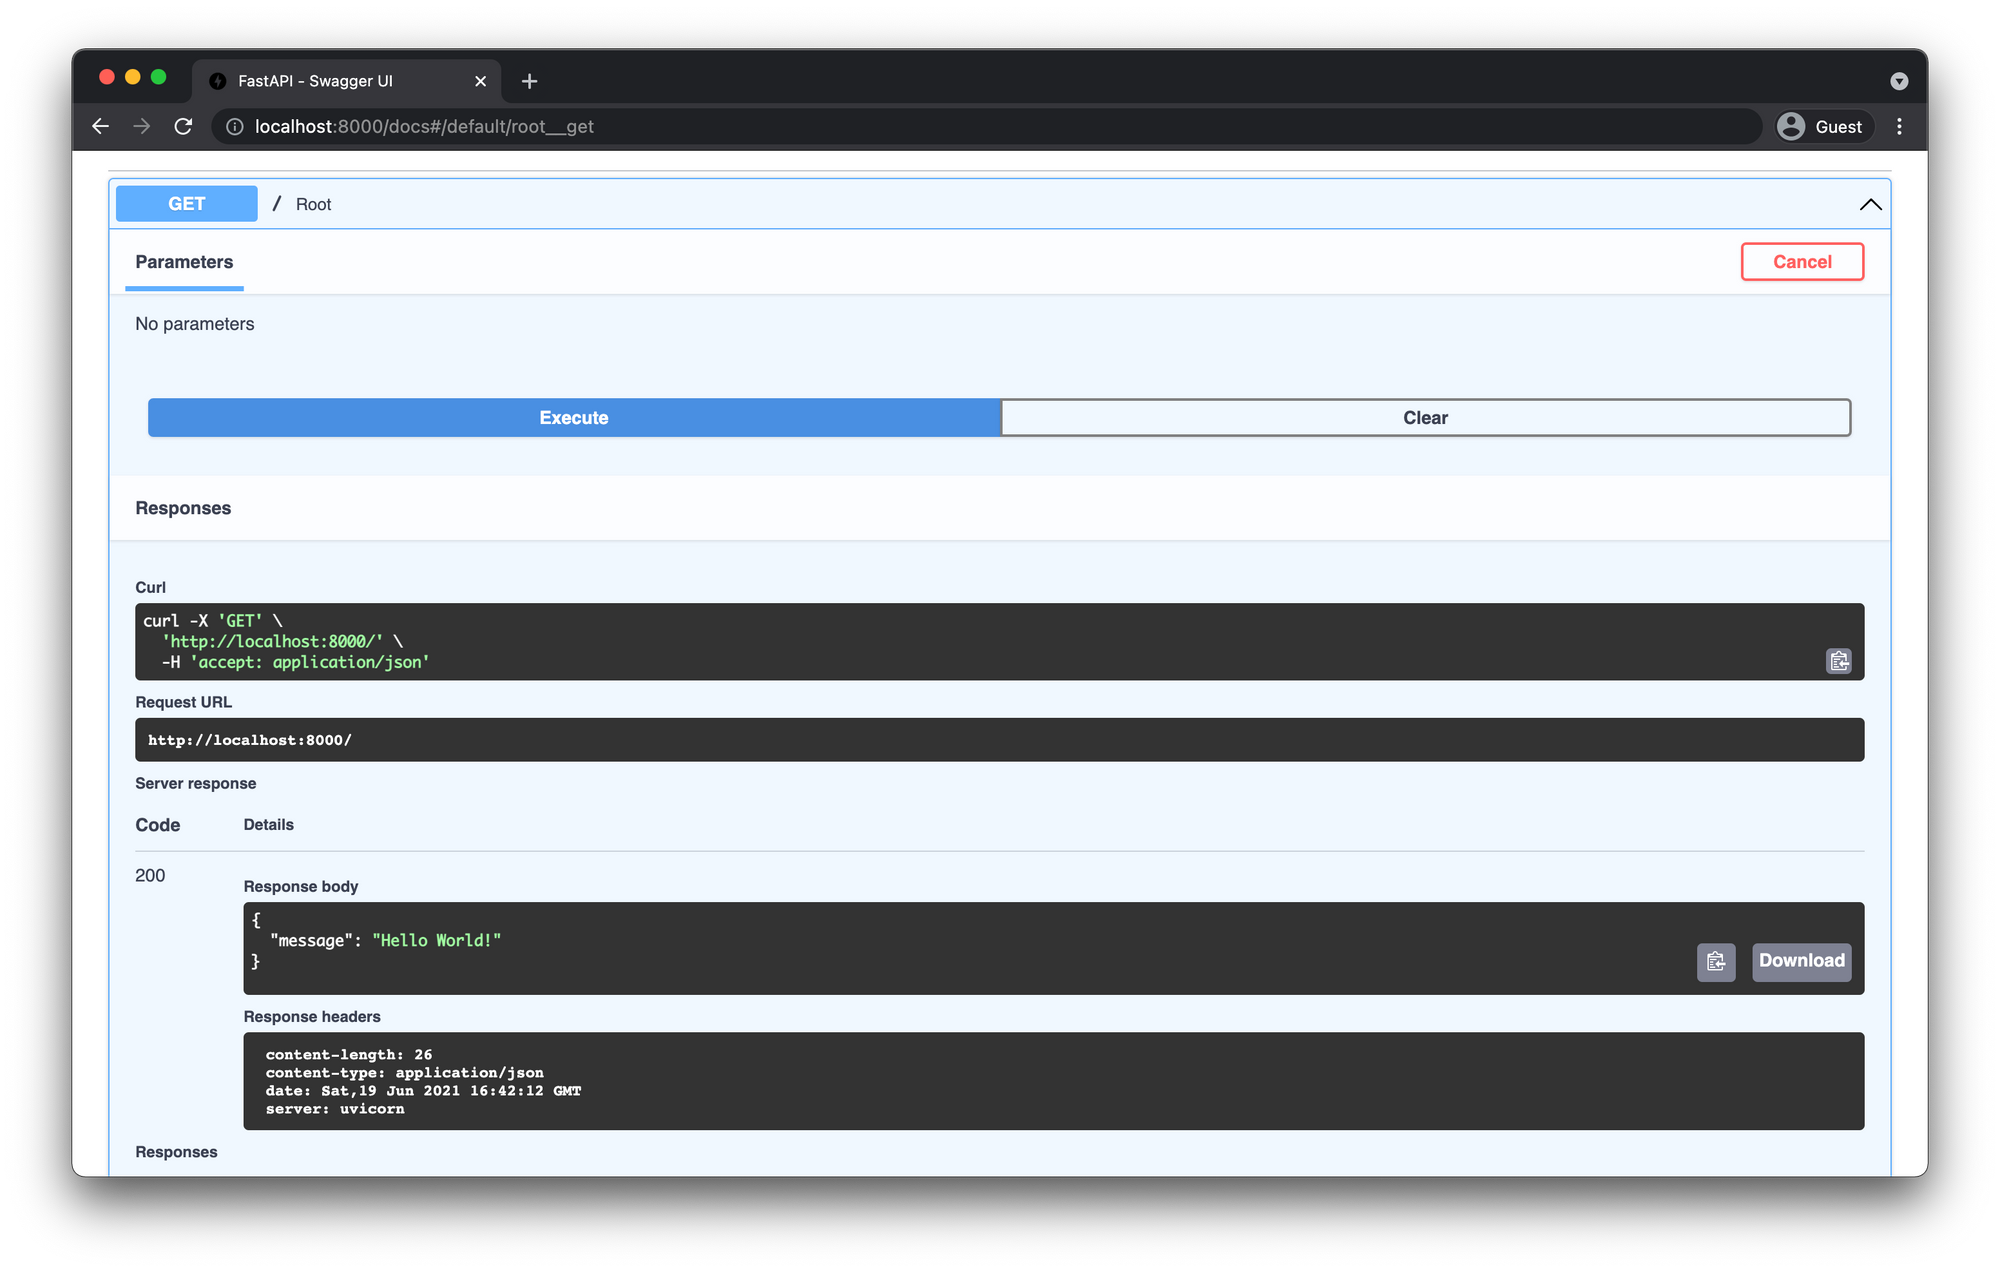
Here you can test your endpoint by clicking on the GET / Root route and then clicking execute.
Add Another Route
Inside the main.py file we're going to add a users route. So your main.py should look like the following.
from fastapi import FastAPI

app = FastAPI()


@app.get("/")
async def root():
    return {"message": "Hello World"}

@app.get("/users")
async def get_users():
    return {"message": "Get Users!"}
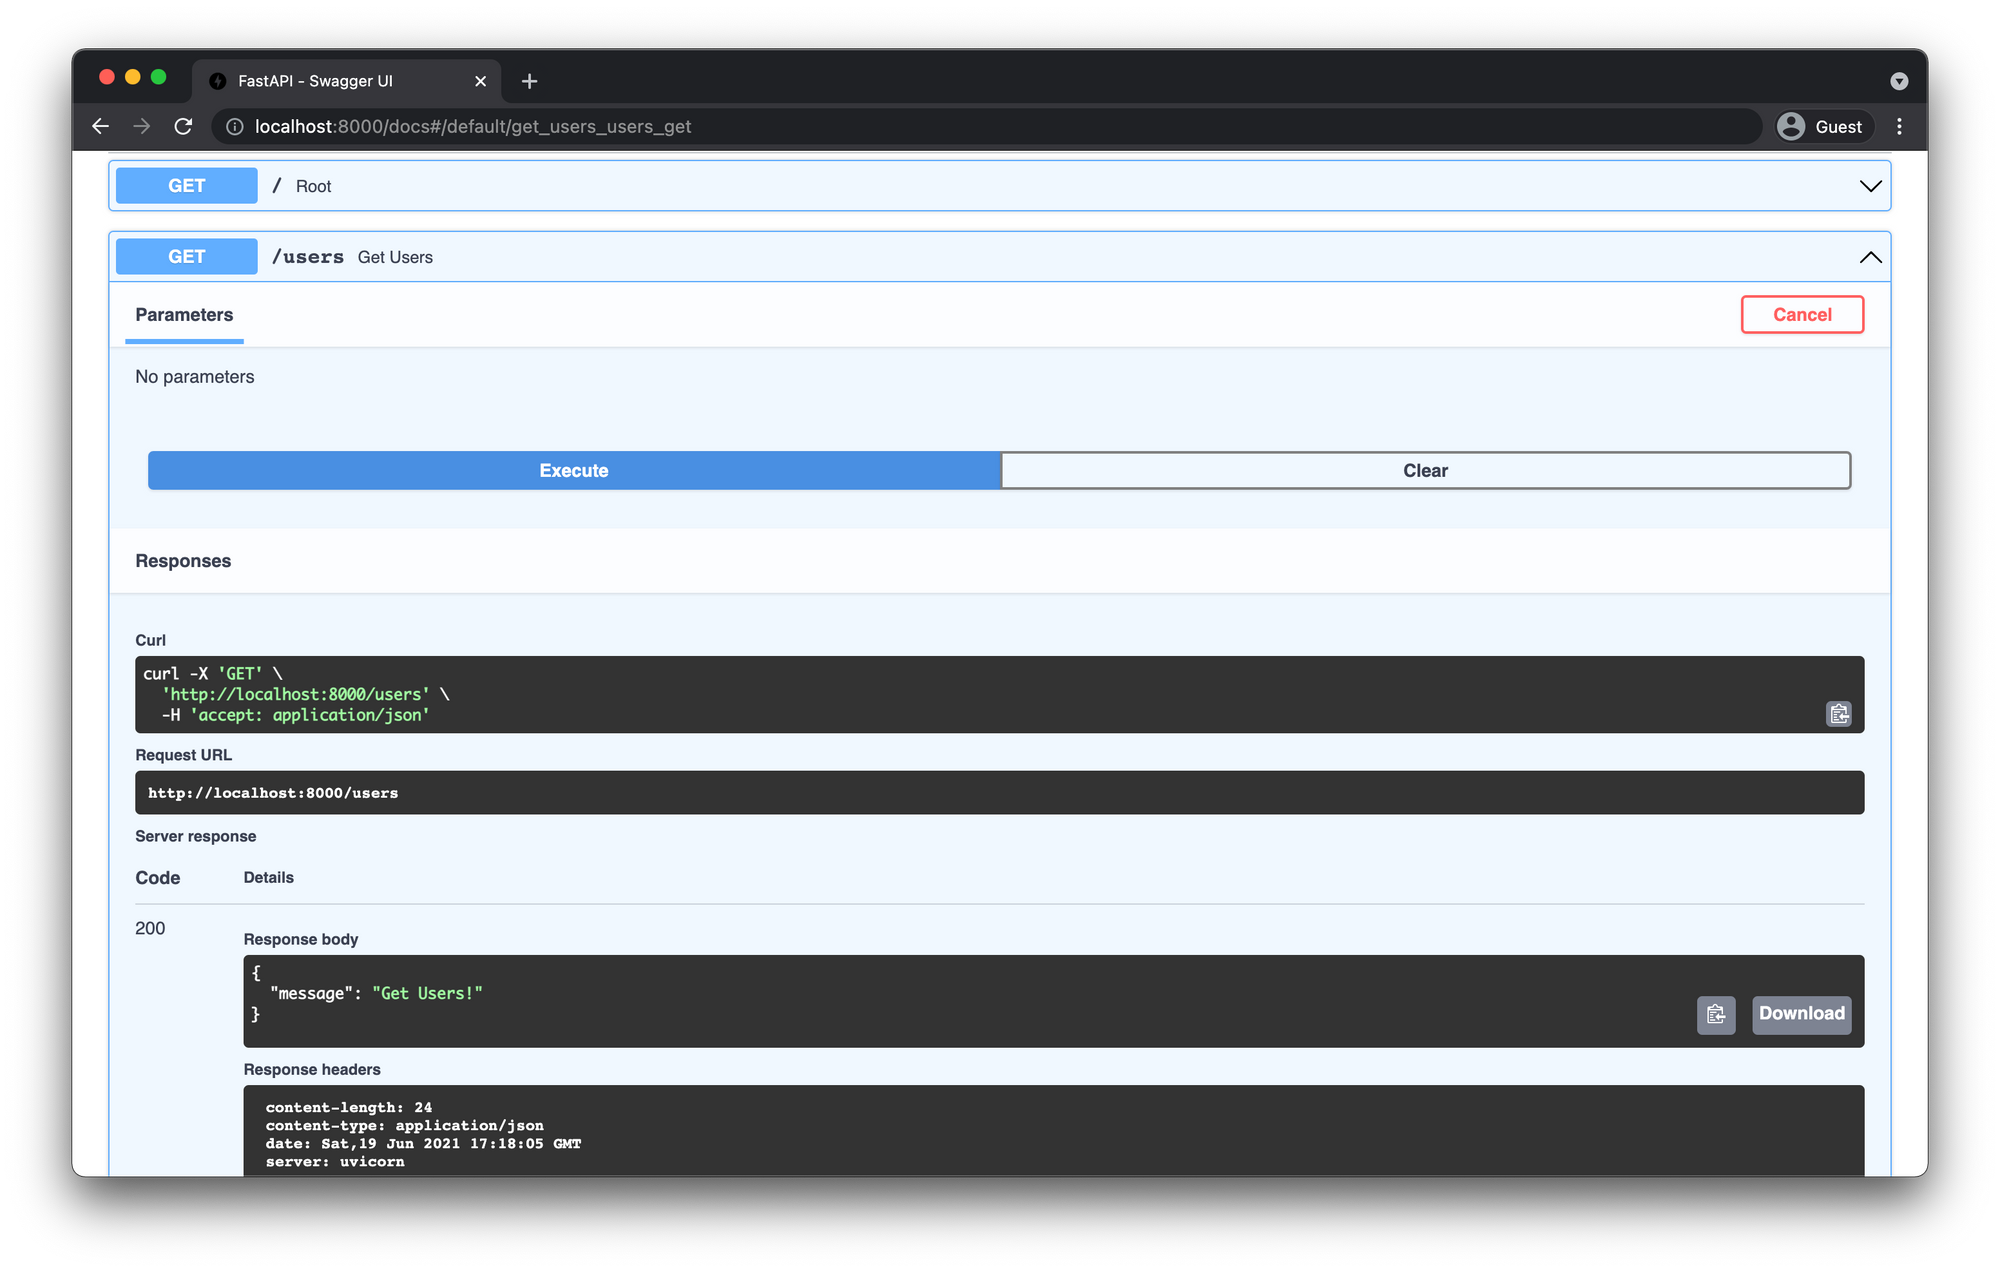
Check the swagger docs again and you should see your new Users route.
Restructure FastAPI Routing
Right now our file tree should look something like this.
.
├── env
├── main.py
This is fine for smaller applications but as the API grows and we add more endpoints and want to handle more business logic we will need a better way to organize our routes.
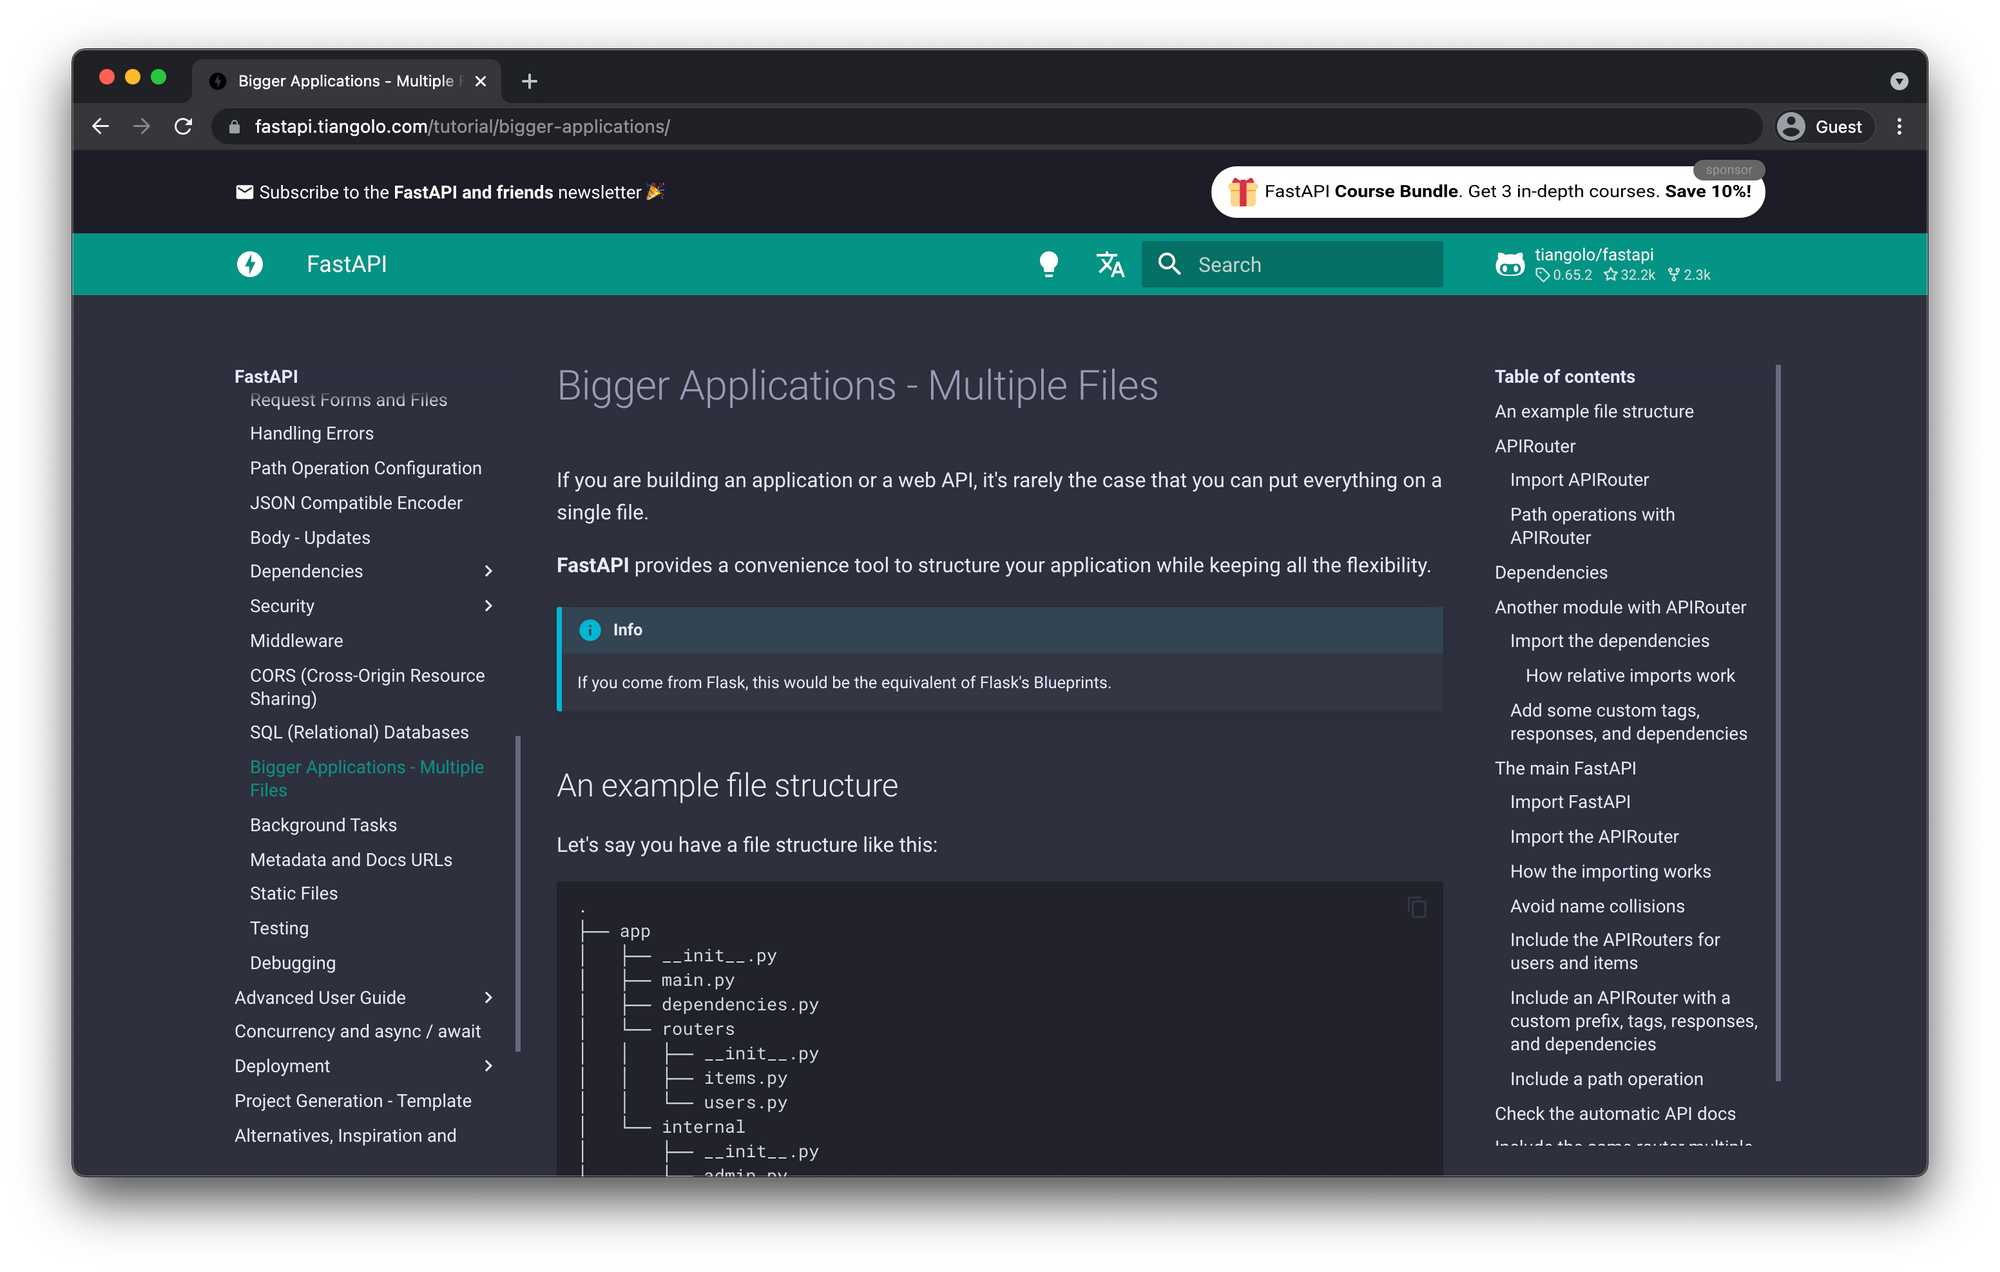
We will be changing our file tree to something like this.
.
└── app
    ├── __init__.py
    ├── main.py
    └── api
        ├── __init__.py
        └── api_v1
            ├── __init__.py
            ├── api.py
            └── endpoints
                ├── __init__.py
                └── users.py
- Create
appfolder - Move
main.pyinto the app directory - Create
__init__.pyfile inside the app folder - Create the
apidirectory and subdirectoryapi_v1 - Add another
__init__.pyfile inside both of those. - Create the
endpointsdirectory and you guessed it another__init__.pyinside that one.
The __init__.py files are what tells Python to treat these as a module that it can import from any of the other files in the project. You'll see how this works in a bit.Create users.py
Create another file in the endpoints directory called users.py and add the following snippet.
from fastapi import APIRouter

router = APIRouter()

@router.get("/")
async def get_users():
    return {"message": "Users!"}
Here we copied over our users route and changed it from @app.get to @router.get. You'll also notice we removed the users from the route itself and only have "/" You'll see why we did that next.
Create api.py
Create another file in the api_v1 folder called api.py and add the following snippet.
from fastapi import APIRouter

from .endpoints import users

router = APIRouter()
router.include_router(users.router, prefix="/users", tags=["Users"])
This is where we can add any new endpoints we want to keep separated and add the prefix "/users" on all sub routes for the users endpoint.
For example if we wanted to create another route to manage blog posts we could add the following.
from fastapi import APIRouter

from .endpoints import users

router = APIRouter()
router.include_router(users.router, prefix="/users", tags=["Users"])
router.include_router(users.router, prefix="/posts", tags=["Posts"])
The tags argument we are passing into the router.include_router adds a tag to the swagger documentation which you will see in a moment.
Update main.py
Now we need to update the main.py file to include our new Users router.
from fastapi import FastAPI
from app.api.api_v1.api import router as api_router

app = FastAPI()


@app.get("/")
async def root():
    return {"message": "Hello World"}


app.include_router(api_router, prefix="/api/v1")
Serverless FastAPI with AWS Lambda
Mangum allows us to wrap the API with a handler that we will package and deploy as a Lambda function in AWS. Then using AWS API Gateway we will route all incoming requests to invoke the lambda and handle the routing internally within our application.
Install Mangum
pip install mangum
Update main.py
Now that we have Mangum installed we need to implement it within our main.py file.
from fastapi import FastAPI

from app.api.api_v1.api import router as api_router
from mangum import Mangum

app = FastAPI()


@app.get("/")
async def root():
    return {"message": "Hello World!"}


app.include_router(api_router, prefix="api/v1")
handler = Mangum(app)
Setup AWS Resources
This tutorial should fall under the AWS free-tier to create, however continued usage of these resources will have associated costs.
Create S3 Bucket
- Navigate to S3 in the AWS console and click Create Bucket.
- Give it a name and click Create. In this example we're going to call it
serverless-fastapi-lambda-dev
Upload Zip File
Before we can create the lambda we need to package up our existing FastApi app so its ready for AWS Lambda.
The lambda won't be running in the virtual environment and will only be running one command (which we will determine when we create it) which will be app.main.handler So we need to install all the dependencies within the zip file since it won't be running pip install like we did locally.
Package Lambda
Inside your terminal from the root directory of your project, CD into the Python Site Packages folder.
cd env/lib/python3.7/site-packages
Then zip up the contents into the root of the project.
zip -r9 path/to/root/of/project/function.zip
CD back into the root of the project.
cd path/to/root/of/project
Next we need to add the contents of the app folder so let's add that into the zip file.
zip -g ./function.zip -r app
Upload Zip File to S3
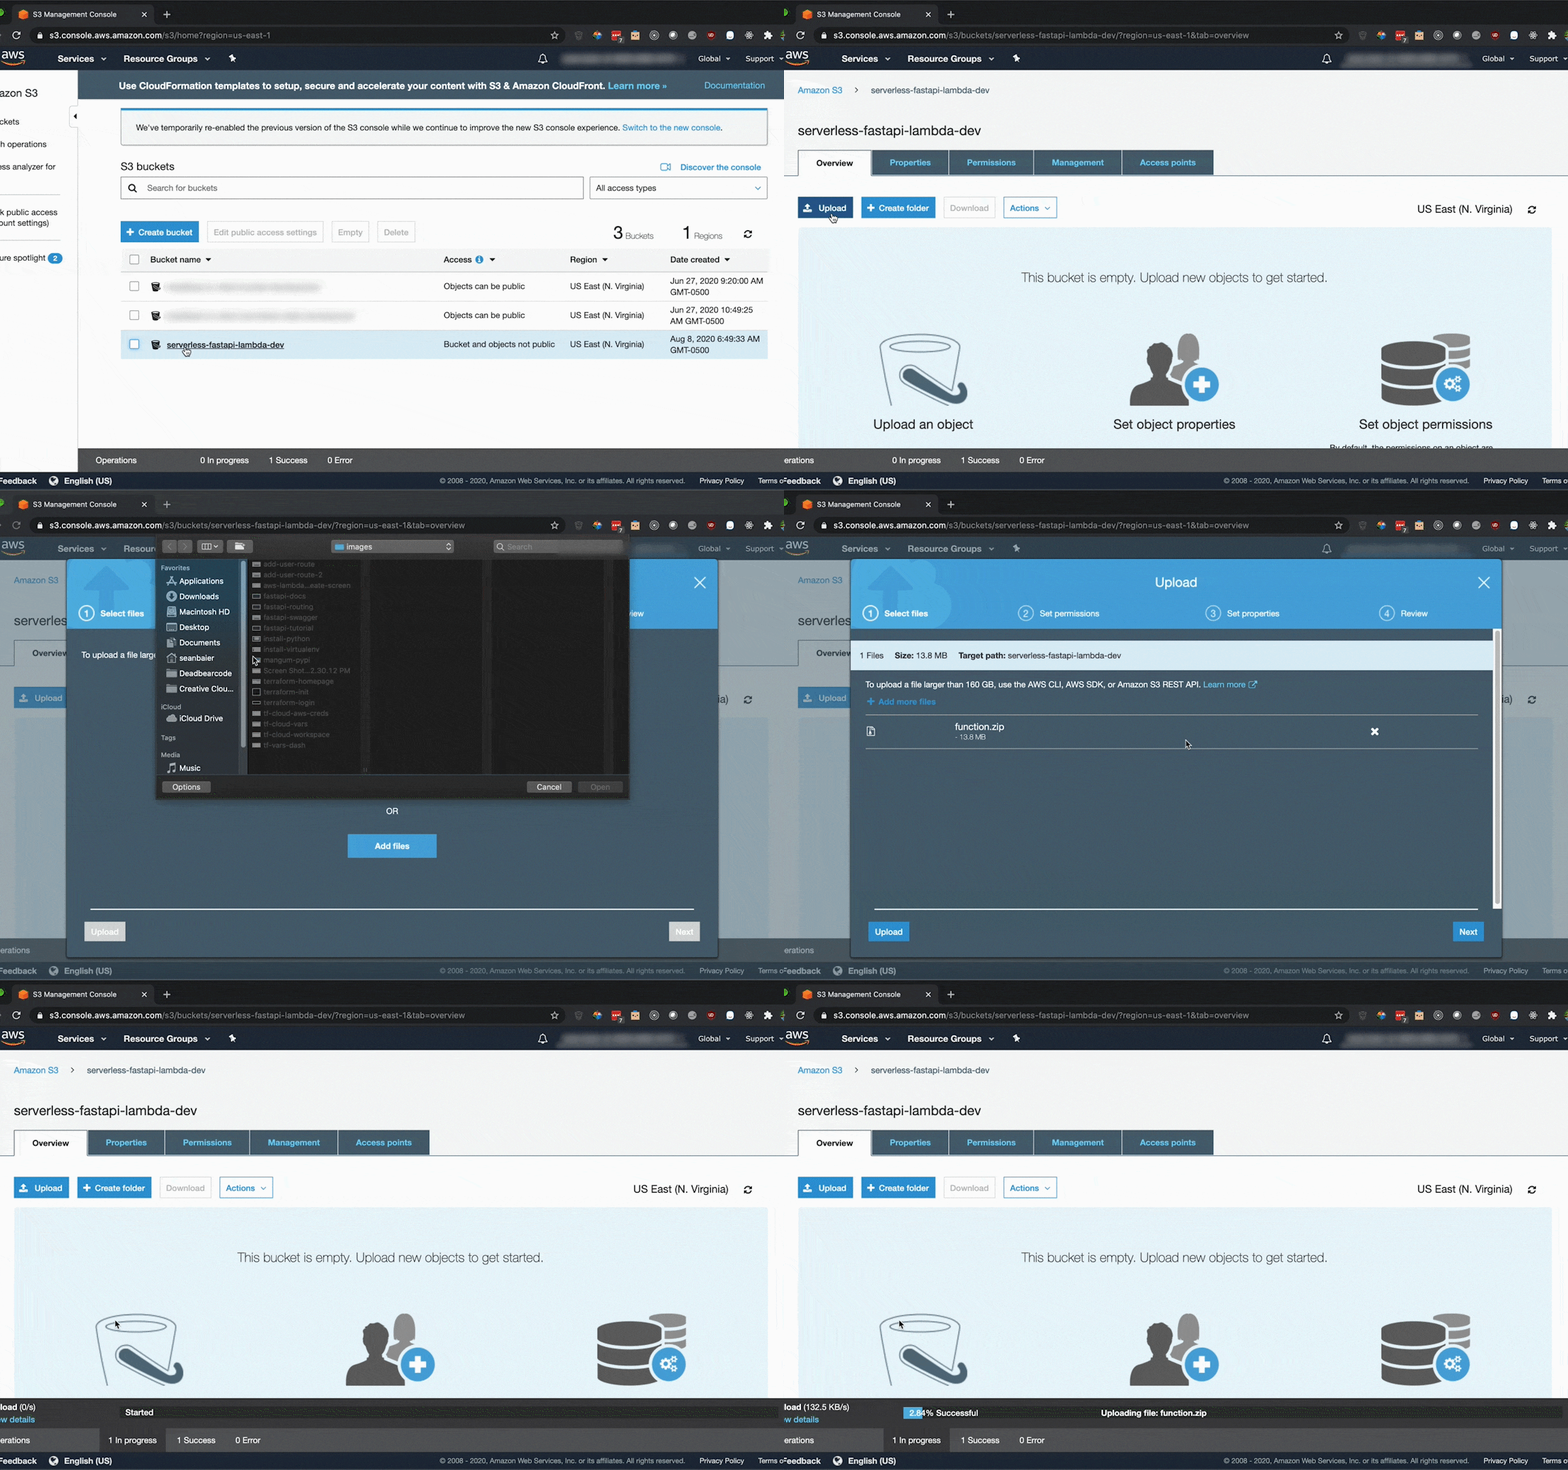
- Go inside the S3 bucket you just created and click Upload.
- Add your zip file through the interface that pops up and and click Upload.
Create AWS Lambda
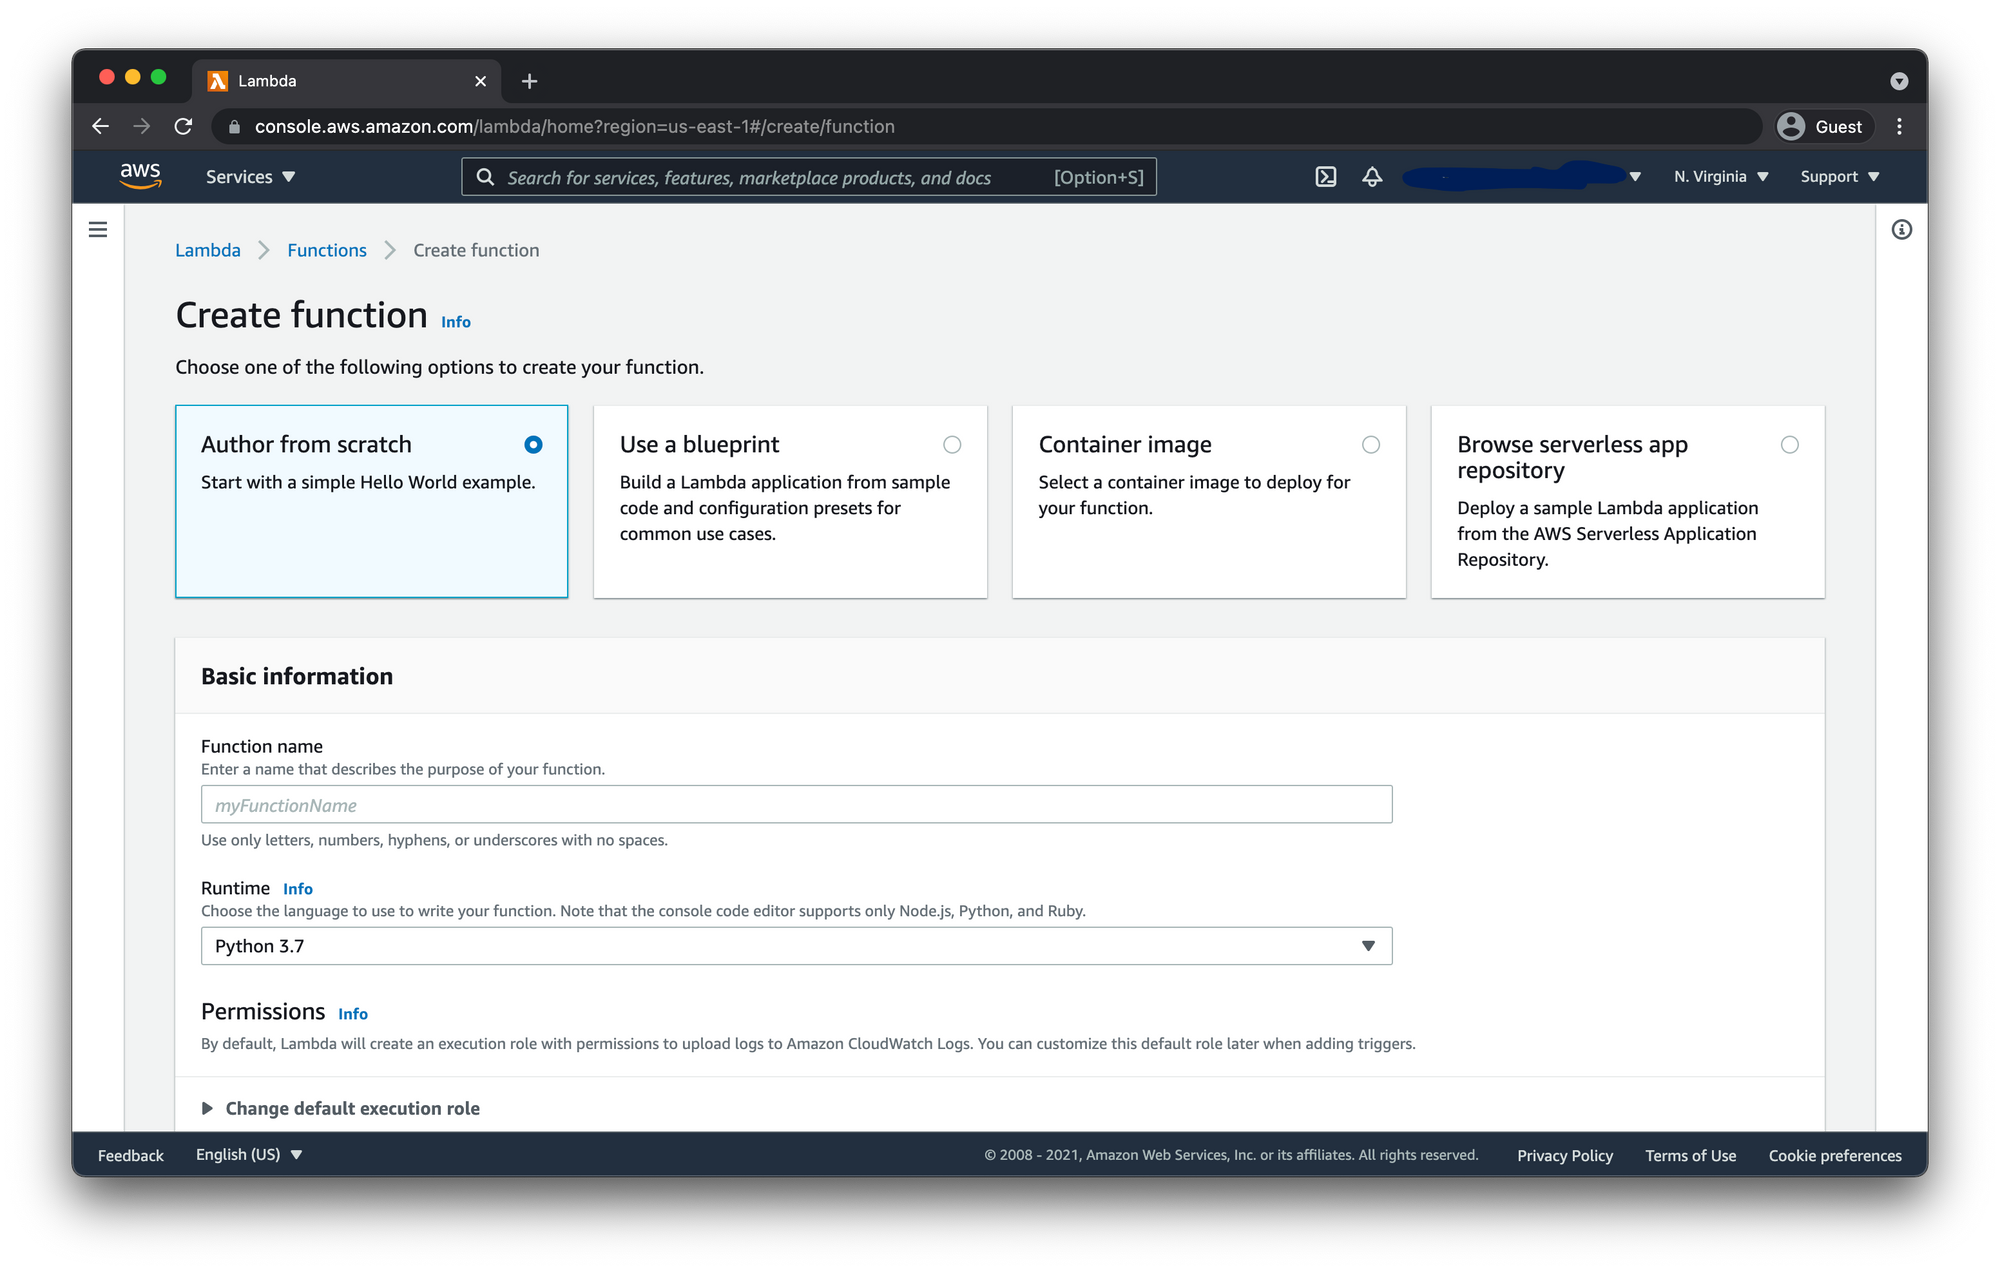
- Navigate to Lambda and click Create Lambda
- Author from scratch and add a name
- Select Python 3.7 Runtime
- Choose or create an execution role
- Create new role using the default is fine.
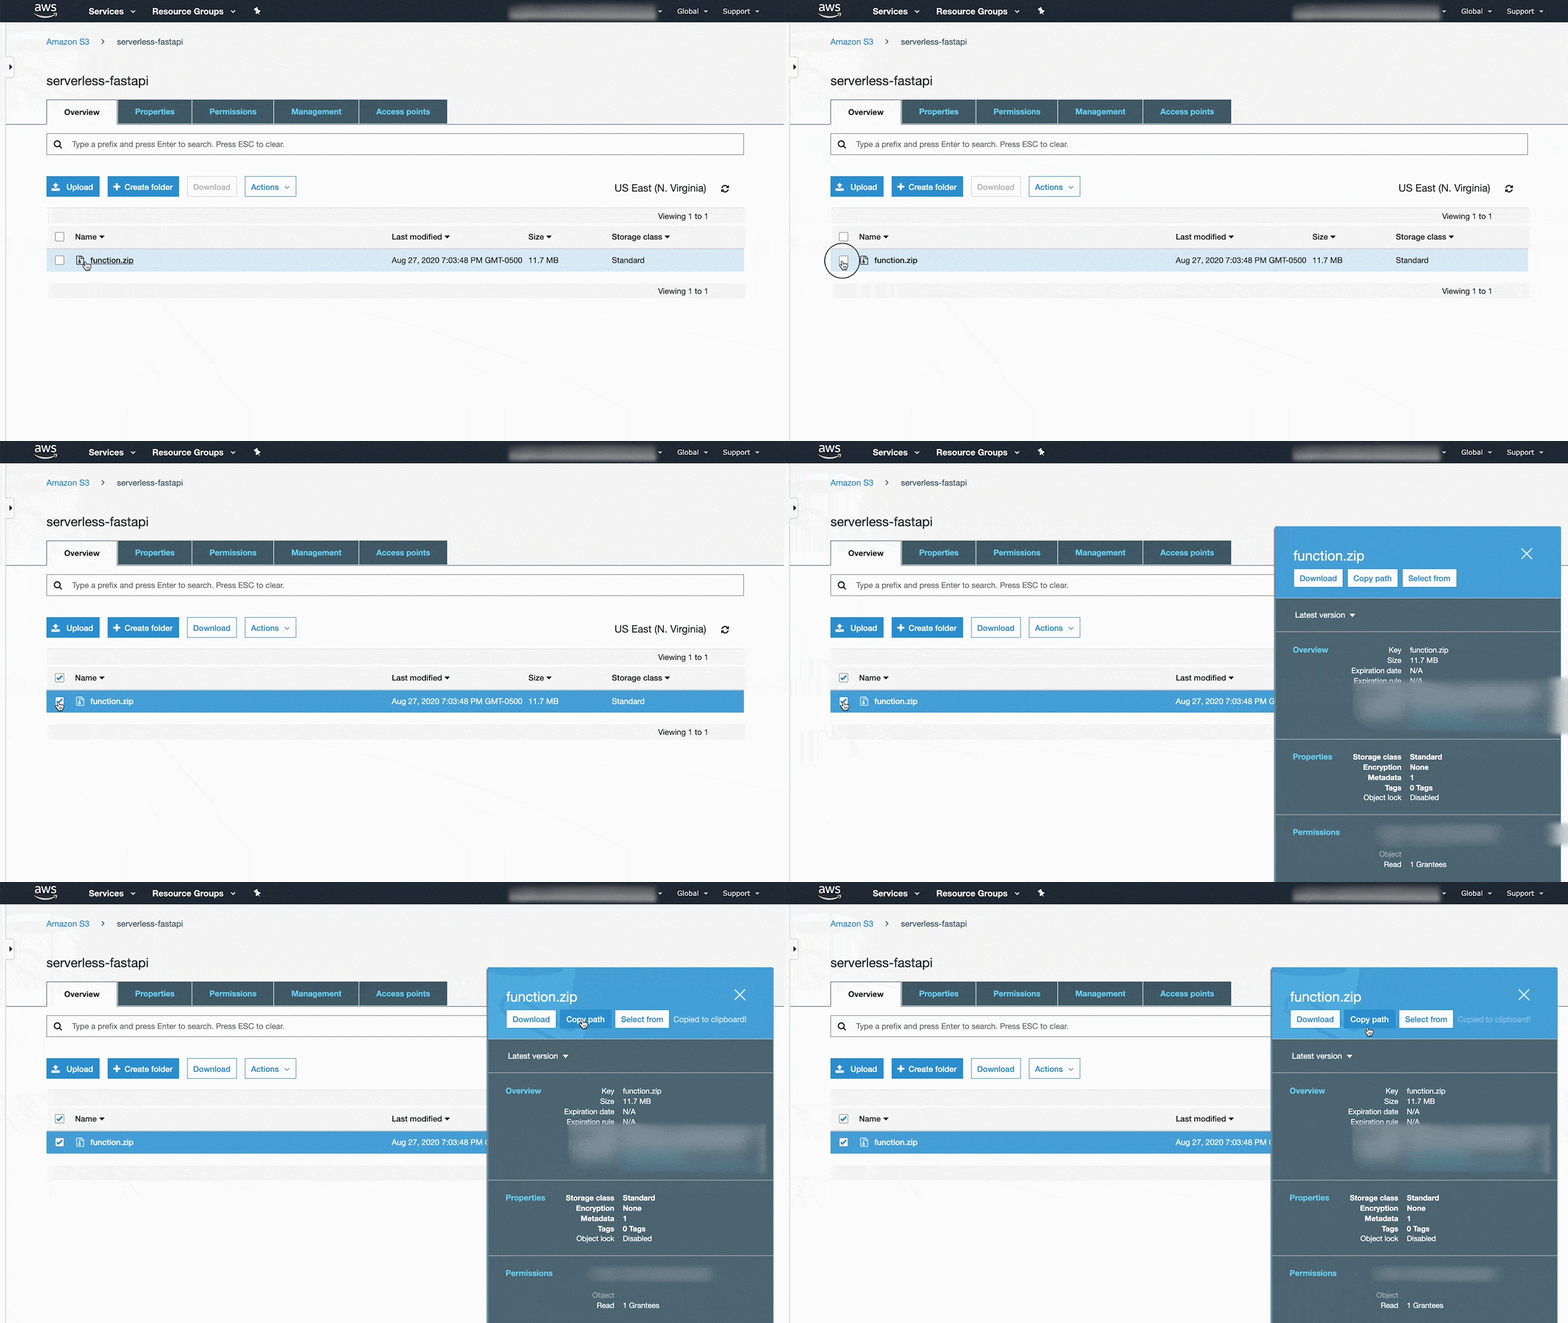
Next we need to upload the zip file from S3. For this we will need the path to the zip file in our S3 bucket. So go to your zip file and check the tick box next to it and click copy path.
Now back in the Lambda dashboard for your function click the Actions dropdown and select Upload a file from Amazon S3.
Update Handler
By default Lambdas will look for the handler to call the function at lambda_function.lambda_handler So we need to change this to match FastAPI.
Under the Basic Settings menu click Edit then update the Handler to app.main.handler
Test FastAPI Lambda
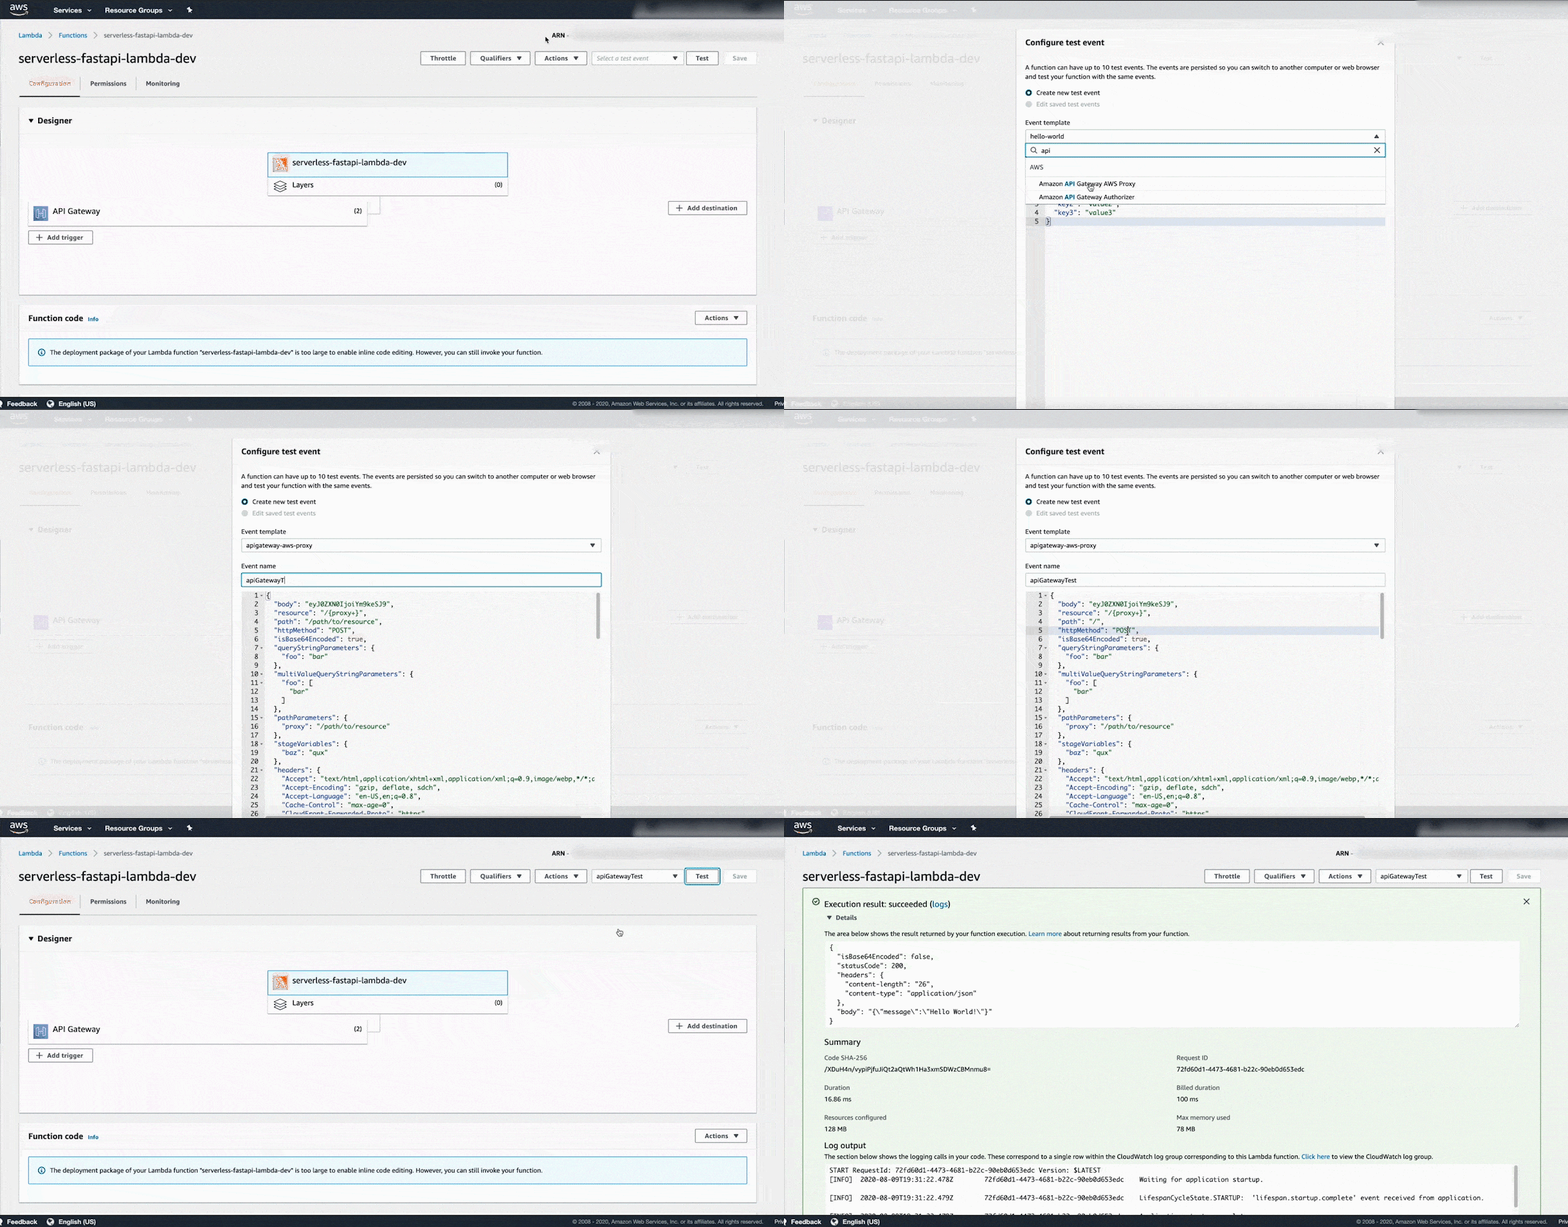
Click the Test button at the top of the dashboard and the select the Event Template dropdown and search for API Gateway Proxy.
This test is going to simulate API Gateway invoking the Lambda on a request to our API. So in the JSON document provided we need to update the path and httpMethod key value pairs from the following:
{
  "body": "eyJ0ZXN0IjoiYm9keSJ9",
  "resource": "/{proxy+}",
  "path": "/path/to/resource",
  "httpMethod": "POST",
  "isBase64Encoded": true
  ...
}
To this
{
  "body": "eyJ0ZXN0IjoiYm9keSJ9",
  "resource": "/{proxy+}",
  "path": "/",
  "httpMethod": "GET",
  "isBase64Encoded": true
  ...
}
Once you have updated the JSON file go ahead and click Create then click the Test button again.
Create API Gateway
Now we need to choose which kind of API Gateway we want to build. In this case we are going to make a public REST API. So navigate to API Gateway and then click the Build button under the REST API option that DOES NOT say "private".
Choose the Protocol
Keep all the default configurations on this page as is. Then give your API Gateway a name and an optional description then click Create API
Now your API Gateway should look something like this.
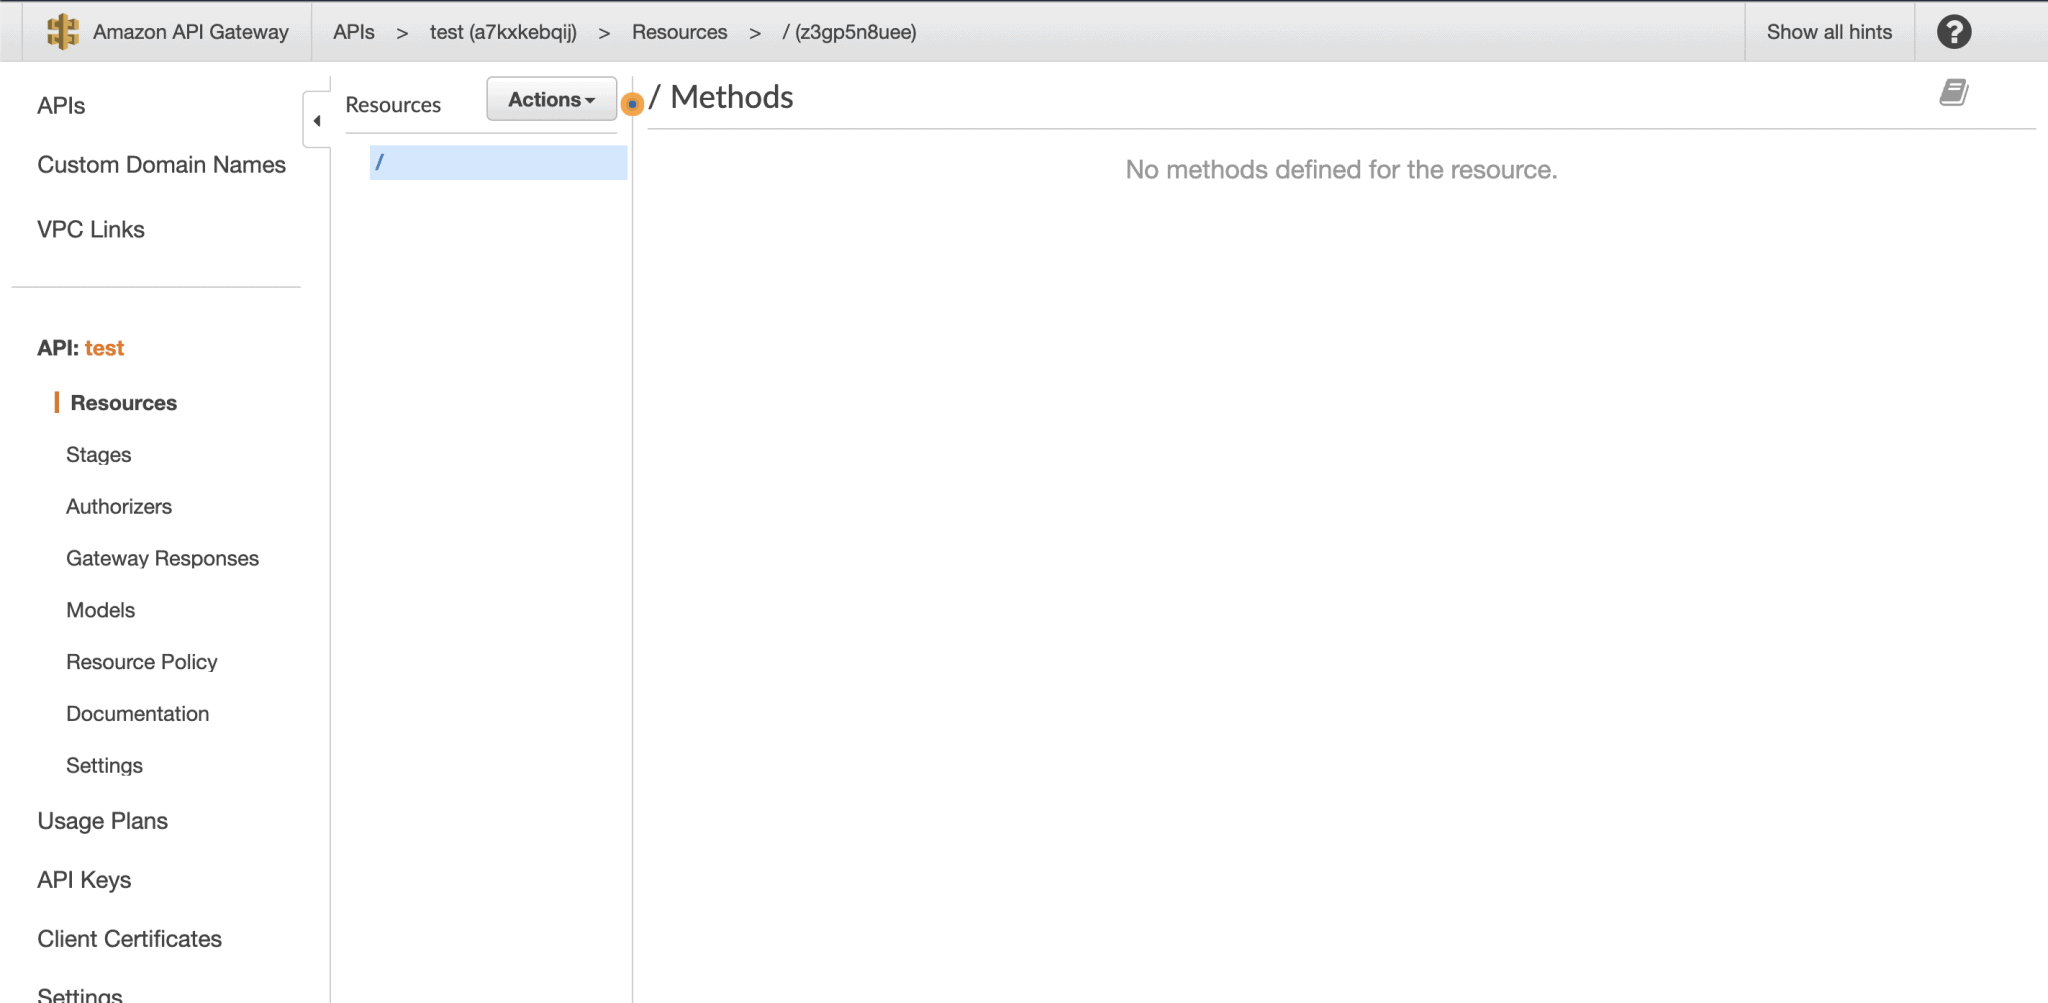
Create Root Proxy Method
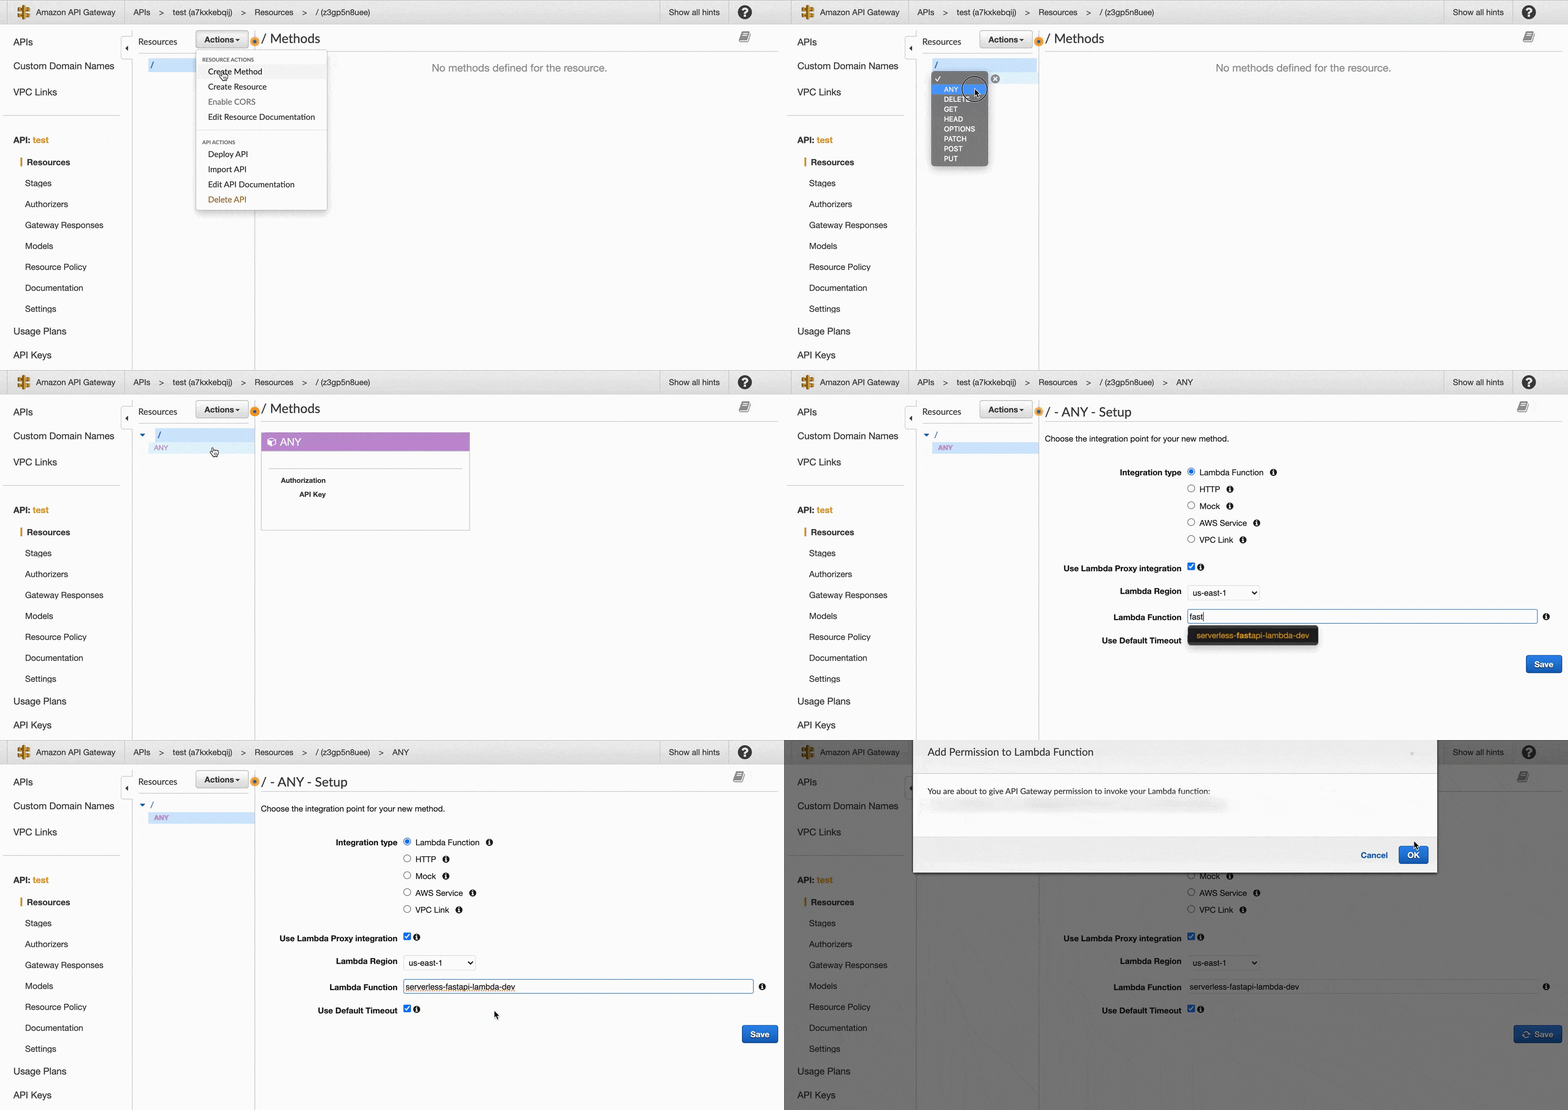
Next the Root Proxy Method will handle forwarding all requests with the base path of / to our FastAPI Lambda. Let's go ahead and create this Method.
- Navigate to API Gateway and Click on the Resources menu item in the left-hand sidebar.
- Select Create Method in the Actions dropdown
- Select ANY from the prompted dropdown and then click the check mark.
- Check use Lambda Proxy Integration and enter the Lambda Function name than click Save.
- It will prompt you to add permission to Lambda function click OK.
Create Resource
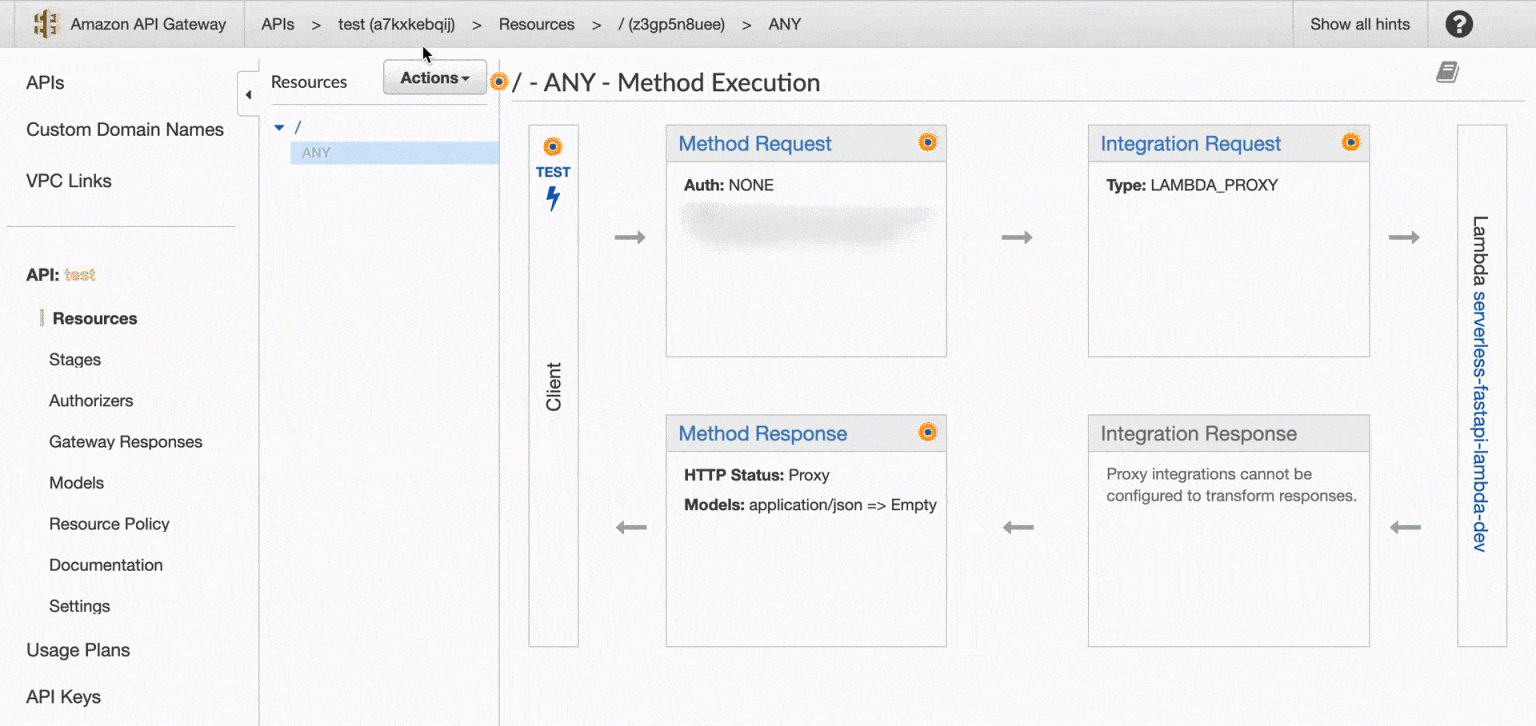
Next the following Resource or endpoint we are need to make will handle all other requests.
So if you add a new route to FastAPI like /posts API Gateway will forward the request to the Serverless FastAPI Lambda the same as if it was / or any other path /pets/{pet_id}
- Click on resources and select Create Resource from the Actions dropdown
- Check Configure as proxy
- This should automatically add the /{proxy+} to the Resource Path but if not make sure you add it in there.
- Add Lambda Function Name and leave everything else as default and click Save
- It will prompt you to add permission to Lambda function click OK.
Deploy Lambda Proxy API
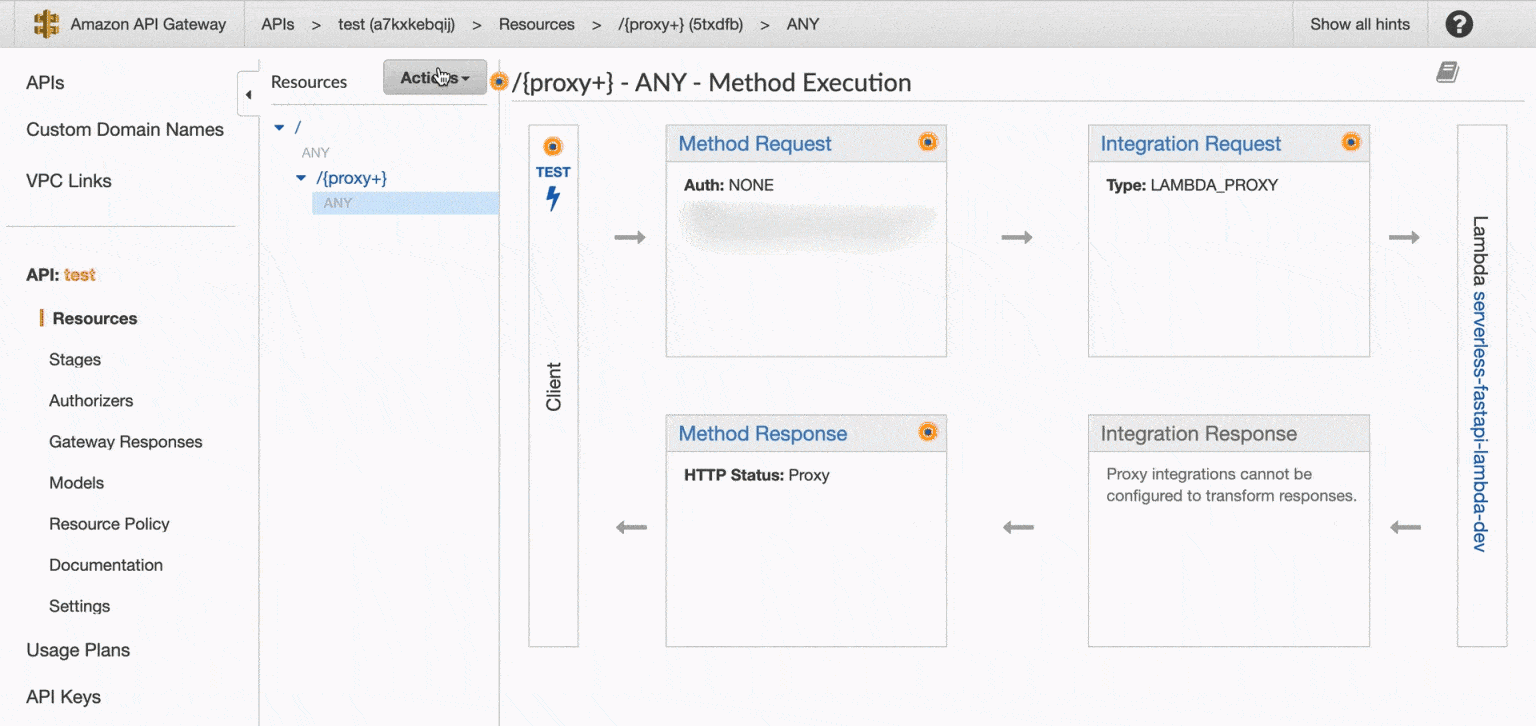
Finally we need to deploy the API in order for the endpoint to be public.
- Select Deploy API from the Actions dropdown
- Select New Stage from Deployment Stage dropdown
- Name it and click Deploy
You will then be taken to the Stage dashboard and you can access your newly deployed Serverless FastAPI with AWS Lambda by clicking the **Invoke URL** link! It should look something like this.
Invoke URL: https://a7kxkebqij.execute-api.us-east-1.amazonaws.com/dev
Summary
That's it! We Created a FastAPI application and converted it to an AWS Lambda. Then we setup API Gateway to route all requests to our Lambda proxy.
If you want to see how to setup a CICD pipeline for this app using CircleCi and Github you can check out Serverless FastAPI CICD with CircleCI
Serverless FastAPI with AWS Lambda Video Walkthrough
You can find the video for this and other Web Development tutorials on the Deadbear Youtube Channel DeadbearCode!
Join the conversation.